ไปยังเนื้อหาหลัก

วิธีป้องกันไม่ให้ลบเนื้อหาของเซลล์ใน Excel

บทความนี้พูดถึงการป้องกันไม่ให้ลบเนื้อหาของเซลล์ใน Excel คุณสามารถบรรลุได้ด้วยวิธีการในบทความนี้

ป้องกันไม่ให้เนื้อหาของเซลล์ถูกลบโดยการปกป้องแผ่นงาน
ป้องกันไม่ให้เนื้อหาของเซลล์ถูกลบโดยใช้รหัส VBA


ป้องกันไม่ให้เนื้อหาของเซลล์ถูกลบโดยการปกป้องแผ่นงาน

ตามค่าเริ่มต้นเซลล์ทั้งหมดในแผ่นงานจะถูกล็อค หากคุณต้องการป้องกันไม่ให้ลบเนื้อหาของเซลล์และทำให้เซลล์อื่นสามารถแก้ไขได้หลังจากป้องกันแล้วโปรดทำดังนี้

1 คลิกที่ ที่มุมบนซ้ายของแผ่นงานเพื่อเลือกทั้งแผ่นงาน จากนั้นกด Ctrl + 1 คีย์เพื่อเปิด จัดรูปแบบเซลล์ กล่องโต้ตอบ

2. ในการโผล่ขึ้นมา จัดรูปแบบเซลล์ กล่องโต้ตอบยกเลิกการเลือก ล็อค ภายใต้ การป้องกัน จากนั้นคลิกแท็บ OK ปุ่ม. ดูภาพหน้าจอ:

3. เลือกเซลล์ที่คุณไม่ต้องการให้ลบเนื้อหาแล้วกด Ctrl + 1 ปุ่มเพื่อเปิดไฟล์ จัดรูปแบบเซลล์ กล่องโต้ตอบอีกครั้งตรวจสอบไฟล์ ล็อค ภายใต้ การป้องกัน จากนั้นคลิกแท็บ OK ปุ่ม

4. ตอนนี้คลิก รีวิว > ป้องกันแผ่นงานจากนั้นระบุและยืนยันรหัสผ่านของคุณทั้งในไฟล์ ป้องกันแผ่นงาน และ ยืนยันรหัสผ่าน กล่องโต้ตอบ

ตอนนี้แผ่นงานได้รับการป้องกัน และเนื้อหาของเซลล์ที่ระบุจะไม่ถูกลบอีกต่อไป


ป้องกันไม่ให้เนื้อหาของเซลล์ถูกลบโดยใช้รหัส VBA

นอกเหนือจากสองวิธีข้างต้นคุณสามารถเรียกใช้รหัส VBA เพื่อป้องกันไม่ให้ลบเนื้อหาของเซลล์ในแผ่นงานได้ กรุณาดำเนินการดังนี้

1. เปิดแผ่นงานที่มีเนื้อหาของเซลล์ที่คุณไม่ต้องการลบคลิกขวาที่แท็บแผ่นงานจากนั้นคลิก ดูรหัส จากเมนูคลิกขวา

2. คัดลอกและวางโค้ด VBA ด้านล่างลงในหน้าต่างรหัสของ Microsoft Visual Basic สำหรับแอปพลิเคชัน หน้าต่าง

รหัส VBA: ป้องกันไม่ให้ลบเนื้อหาของเซลล์ใน Excel

Private Sub Worksheet_Change(ByVal Target As Range)
    If Intersect(Target, Range("A1:E7")) Is Nothing Then Exit Sub
    On Error GoTo ExitPoint
    Application.EnableEvents = False
    If Not IsDate(Target(1)) Then
        Application.Undo
        MsgBox " You can't delete cell contents from this range " _
        , vbCritical, "Kutools for Excel"
    End If
ExitPoint:
    Application.EnableEvents = True
End Sub

หมายเหตุ: ในรหัส A1: E17 คือช่วงที่เนื้อหาของเซลล์ที่คุณจะป้องกันไม่ให้ถูกลบ คุณสามารถเปลี่ยนช่วงตามความต้องการของคุณ

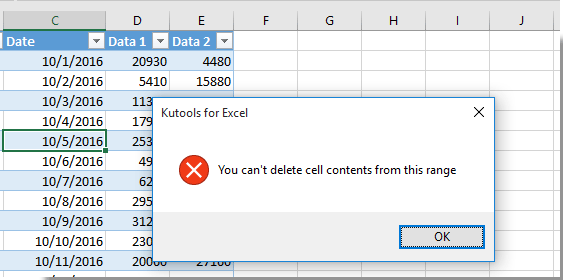
จากนี้ไปเมื่อคุณพยายามลบเนื้อหาเซลล์จากช่วง A1: E17 คุณจะได้รับไฟล์ Kutools สำหรับ Excel กล่องโต้ตอบด้านล่างภาพหน้าจอที่แสดงโปรดคลิกที่ไฟล์ OK ปุ่ม


บทความที่เกี่ยวข้อง:

สุดยอดเครื่องมือเพิ่มผลผลิตในสำนักงาน

🤖 Kutools AI ผู้ช่วย: ปฏิวัติการวิเคราะห์ข้อมูลโดยยึดตาม: การดำเนินการที่ชาญฉลาด   |  สร้างรหัส  |  สร้างสูตรที่กำหนดเอง  |  วิเคราะห์ข้อมูลและสร้างแผนภูมิ  |  เรียกใช้ฟังก์ชัน Kutools...
คุณสมบัติยอดนิยม: ค้นหา เน้น หรือระบุรายการที่ซ้ำกัน   |  ลบแถวว่าง   |  รวมคอลัมน์หรือเซลล์โดยไม่สูญเสียข้อมูล   |   รอบโดยไม่มีสูตร ...
การค้นหาขั้นสูง: VLookup หลายเกณฑ์    VLookup หลายค่า  |   VLookup ข้ามหลายแผ่น   |   การค้นหาที่ไม่ชัดเจน ....
รายการแบบเลื่อนลงขั้นสูง: สร้างรายการแบบหล่นลงอย่างรวดเร็ว   |  รายการแบบหล่นลงขึ้นอยู่กับ   |  เลือกหลายรายการแบบหล่นลง ....
ผู้จัดการคอลัมน์: เพิ่มจำนวนคอลัมน์เฉพาะ  |  ย้ายคอลัมน์  |  สลับสถานะการมองเห็นของคอลัมน์ที่ซ่อนอยู่  |  เปรียบเทียบช่วงและคอลัมน์ ...
คุณสมบัติเด่น: กริดโฟกัส   |  มุมมองการออกแบบ   |   บาร์สูตรใหญ่    สมุดงานและตัวจัดการชีต   |  ห้องสมุดทรัพยากร (ข้อความอัตโนมัติ)   |  เลือกวันที่   |  รวมแผ่นงาน   |  เข้ารหัส/ถอดรหัสเซลล์    ส่งอีเมลตามรายการ   |  ซุปเปอร์ฟิลเตอร์   |   ตัวกรองพิเศษ (กรองตัวหนา/ตัวเอียง/ขีดทับ...) ...
ชุดเครื่องมือ 15 อันดับแรก12 ข้อความ เครื่องมือ (เพิ่มข้อความ, ลบอักขระ, ... )   |   50 + แผนภูมิ ประเภท (แผนภูมิ Gantt, ... )   |   40+ ใช้งานได้จริง สูตร (คำนวณอายุตามวันเกิด, ... )   |   19 การแทรก เครื่องมือ (ใส่ QR Code, แทรกรูปภาพจากเส้นทาง, ... )   |   12 การแปลง เครื่องมือ (ตัวเลขเป็นคำ, การแปลงสกุลเงิน, ... )   |   7 ผสานและแยก เครื่องมือ (แถวรวมขั้นสูง, แยกเซลล์, ... )   |   ... และอื่น ๆ

เพิ่มพูนทักษะ Excel ของคุณด้วย Kutools สำหรับ Excel และสัมผัสประสิทธิภาพอย่างที่ไม่เคยมีมาก่อน Kutools สำหรับ Excel เสนอคุณสมบัติขั้นสูงมากกว่า 300 รายการเพื่อเพิ่มประสิทธิภาพและประหยัดเวลา  คลิกที่นี่เพื่อรับคุณสมบัติที่คุณต้องการมากที่สุด...

รายละเอียด


แท็บ Office นำอินเทอร์เฟซแบบแท็บมาที่ Office และทำให้งานของคุณง่ายขึ้นมาก

  • เปิดใช้งานการแก้ไขและอ่านแบบแท็บใน Word, Excel, PowerPoint, ผู้จัดพิมพ์, Access, Visio และโครงการ
  • เปิดและสร้างเอกสารหลายรายการในแท็บใหม่ของหน้าต่างเดียวกันแทนที่จะเป็นในหน้าต่างใหม่
  • เพิ่มประสิทธิภาพการทำงานของคุณ 50% และลดการคลิกเมาส์หลายร้อยครั้งให้คุณทุกวัน!
Comments (18)
Rated 5 out of 5 · 1 ratings
This comment was minimized by the moderator on the site
Hi,

This is exactly what I was looking for, but it doesn't work for me...
This says: "End Sub expected"

Can you help me ?

Thanks :)
This comment was minimized by the moderator on the site
This is great. I was wondering if this was an option and sure enough it was. Thank you for the very easy instructions.

Andres S.
Rated 5 out of 5
This comment was minimized by the moderator on the site
No, I meant NOT to allow deletion (without protecting the wks or wkb).

It is nice the above works at Wks level.

If there is something to make it work at wkb level it would be even better (I have many sheets)

G
This comment was minimized by the moderator on the site
Is it possible to do something similar at workbook level?

Private Sub Worksheet_Change(ByVal Target As Range)
If Intersect(Target, Range("A1:M7000")) Is Nothing Then Exit Sub
On Error GoTo ExitPoint
Application.EnableEvents = False
If Not IsDate(Target(1)) Then
Application.Undo
MsgBox " You can't delete cell contents from this range " _
, vbCritical, "Kutools for Excel"
End If
ExitPoint:
Application.EnableEvents = True
End Sub
This comment was minimized by the moderator on the site
Hi Gelu,
Do you mean to prevent the range "A1:M7000" from being deleted in all worksheets of the current workbook?
This comment was minimized by the moderator on the site
Thank you for the valuable information.
Regarding the below VBA:
Private Sub Worksheet_Change(ByVal Target As Range)
If Intersect(Target, Range("A1:E7")) Is Nothing Then Exit Sub
On Error GoTo ExitPoint
Application.EnableEvents = False
If Not IsDate(Target(1)) Then
Application.Undo
MsgBox " You can't delete cell contents from this range " _
, vbCritical, "Kutools for Excel"
End If
ExitPoint:
Application.EnableEvents = True
End Sub

The above will allow execution within a certain specified range. It does not allow the addition of new rows. Is there a way that new rows can be added yet maintaining the same protection.
thanks and regards
This comment was minimized by the moderator on the site
Hi Oussama Abou faraj,
After trying with various methods, I can't seem to get this to work. After adding a new row, the area will be locked Immediately and the newly inserted cell cannot be edited.
This comment was minimized by the moderator on the site
Hello, this code works well, however deleting row/collumn will bypass it. Is there any workaround to this? Cheers, David.
This comment was minimized by the moderator on the site
Hi David,
Which Excel version are you using? I have tried the code, entire rows and columns in the specified range can't be deleted after applying the code.
This comment was minimized by the moderator on the site
"Prevent specific cell contents from being deleted by protecting the worksheet"I did as per your guideline, still cell information could be deleted i.e. protection does not work. Any solution.
This comment was minimized by the moderator on the site
Hi Ahsan,
Did you apply the VBA method?
You need to add the VBA to the worksheet code window. Supposing the cell contents you want to protect are in Sheet9, please right click the sheet tab and select View Code from the context menu, and then directly copy the code into the code window as the below image shown.
This comment was minimized by the moderator on the site
VBA Code - Great Tip thanks

Is there a VBA code to Prevent specific cell contents from being modified AND deleted in Excel?
Usual protecting sheet does not work for me as I lose the ability to sort data?

Thanks in advance - Neil
This comment was minimized by the moderator on the site
If you don't wan to look your sheet or write VBA code, then I use a simple technique that prevents from any override except for when they use the "DELETE" key (backspace won't be allowed, but Delete is hard to stop). What I did is added a data validation with the following settings:

1) Allow --> List

2) uncheck "Ignore blank" and "in-cell dropdown"

3) In the source enter two double quotes (i.e., "")

4) In Error Alert tab, check "Show error alter after invalid data is entered", select "Stop" for style, then enter an error message and description (e.g., Don't override)
This comment was minimized by the moderator on the site
Hi,
Thanks for sharing.
This comment was minimized by the moderator on the site
Hi there,

I just tried the VBA script and while it works really well in most situations. However it doesn't work when you tab from an editable cell into the non-editable column/cell. The problem arises in that it throws the error message up - as commanded - but it doesn't keep the data that was entered in the original, editable cell which was tabbed from.

Would you have an amendment to the script so that it accepts the data in the editable cell when you tab into un-editable?

Cheers
This comment was minimized by the moderator on the site
Good day,
I tried as you mentioned in your case, but no error throws. Would you provide a screenshot of your case or tell me your Office version?
Thanks for your comment.
There are no comments posted here yet
Load More
Please leave your comments in English
Posting as Guest
×
Rate this post:
0   Characters
Suggested Locations